English Summer Pudding

June 27, 2010

Down a trail near my home there is a fantastic blackberry patch.  This year there’s a bumper crop and the flavor of the fruit is fantastic.  Every day that I go down there, I can easily pick about 2 lbs of perfectly ripe blackberries in about 15 minutes or so.  Quite a few people go down there to pick fruit, but I bring a small stepladder so that I can reach that tier of ripe fruit that is just out of most people’s reach.  This is where the idea to make summer pudding came from.  Summer Pudding is a classic English dessert, is very simple to make and is astonishingly delicious.  It needs about 6 hours or so to cool down and firm up in the refrigerator, so it’s a good idea to make it the day before you serve it.  I  slightly cooked the berries with apricots for this pudding and used uncooked peach slices too, which give the pudding a little extra textural “entertainment”.  Most other summer fruits will work too, raspberries, strawberries, rhubarb, gooseberries, cherries, etc.  You can mix different fruits together, but be sure to remove the stones from cherries, apricots and other stoned fruits.  It is best served with lightly whipped cream or vanilla ice cream.

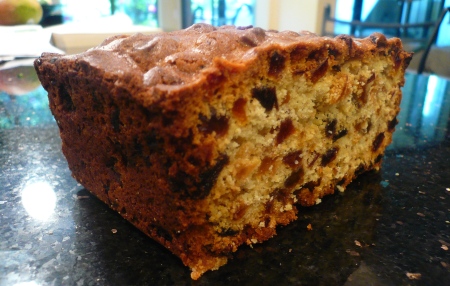
Summer pudding is essentially made from fresh fruit, stale bread and a little sugar and water.  Those ingredients don’t sound very enticing, but this pudding has a sublime flavor and texture that is way more than the sum of it’s ingredients and your guests will be sure that you have included some amazing, secret ingredients!  Here’s how my finished pudding looks:

Ingredients (for 8  servings):

  • 1 medium sized unsliced loaf of white bread, dry and stale

.

.

.

.

.

  • 2   1/2 lbs  soft summer fruit such as apricots, blackberries (must be ripe and very soft), raspberries, rhubarb, strawberries, peaches, cherries, etc.

.

.

.

.                                      .

  • 1 or 2 fresh ripe peaches, do not cook with other fruit (optional)
  • 6 ozs sugar
  • 1/2 cup water
  • 1/2 pint of thick whipping cream or vanilla ice cream to serve with the Summer Pudding

Method:

With a bread knife, remove the crusts from the bread (save to use for something else – lightly toasted, they can be served with cream cheese and jam).

With a sharp bread knife, slice the stale, dry bread into very thin slices.  Try and get them close to 1/8″ thin if you can.  This is hard to do without them crumbling but the very thin slices will greatly enhance the deliciousness of the pudding.  If the bread is still not very dry, place the slices on drying racks and pop them in a very low oven for half an hour or so to finish drying out.

Heat the water and sugar over low to medium heat until the sugar melts, stirring frequently.  When the sugar has melted, add the fruit and simmer gently for about 4 minutes.  If you are using firmer fruit such as gooseberries, blackcurrants, blackberries, cook a little longer until the fruit has softened.  Be careful not to reduce the fruit mixture too much.  Getting the right degree of consistency is important.  Not too thick and not too thin.  Remember that you will need sufficient liquidity to saturate the bread slices without them becoming sloppy.

Take a large bowl or pudding basin and place a layer of dried, stale bread slices on the bottom:

Spoon onto this a thin layer of the hot fruit mixture.  Slice the uncooked peach into smallish slices and place on the fruit mixture:

Keep on adding layers of bread, fruit mix and sliced peaches in this manner until they are all used.  If you have cut the bread thinly, you may have 5 or 6 layers. Finish with a final layer of bread slices:

Place a small plate on the top and carefully “squish” it down to try and get all the air bubbles out:

Place something heavy on the plate, like canned tomatoes, and place in the refrigerator for at least six hours to cool and gel:

To serve, remove the small plate and loosen the pudding with a flexible spatula down the side of the bowl.  Tip the pudding upside down on a plate and serve cool with lightly whipped cream or vanilla ice cream.

White Mussel and Fish Soup with Herbs

June 27, 2010


Readers of this blog may have realized that I particularly love fish soups and stews.  My previous fish soup postings have been complex and time consuming.  This mussel and fish soup, which is based on a traditional Italian recipe, can be prepared, cooked and served in about 30 minutes or less, and is pungent, tasty and extra delicious.  It is not for the timid, however! It’s flavor has a strong garlic base and I have added some fish pieces and several other herbs (the most common traditional versions of this recipe typically only use Italian parsley).  I served this as a light, late evening supper, with a tomato salad (sliced tomatoes, fresh basil, mozzarella slices, black olives, balsamic vinegar and olive oil), some lightly toasted pain au levain slices rubbed with garlic  from Acme Bread Company in Berkeley and I paired it with a delicious 2005 Fume Blanc from Dry Creek Vineyards which proved to be an excellent choice.

My fishmonger had just received a batch of Prince Edward Island Mussels (from Canada). They were of medium size and I used them for this dish.  Previously I have used local Sonoma Coast Mussels, although the ones I had were rather small, but tasty.  My favorite are the New Zealand “Green Lip” mussels. They are big, tasty, good texture and are reputably good for arthritis and other joint ailment.

Ingredients (4 servings):


  • 1  1/2 lbs mussels
  • 1 lb fish, cut into 1″ pieces.  I used salmon and snapper.
  • 1  1/2 cups chopped, fresh herbs.  My mix was predominantly Italian parsley, and smaller amounts of: dill, basil, tarragon, chervil and thyme.
  • 4 – 5 fat cloves garlic, peeled and finely chopped
  • 5 tbs extra virgin olive oil
  • 1/2 bottle dry white wine
  • sea salt or kosher salt and freshly ground black pepper to taste
  • 1 tsp crushed red pepper

Method:

Prepare the mussels by scrubbing thoroughly, removing their beards, scraping off any barnacles and discarding any that are broken or open.  In addition, I always give all mussels that I cook the “sniff test” and discard any that have an “off” smell.  Set aside for later.

Cut the fish up into 1″ cubes.  My fishmonger had some small salmon and snapper tails that were half price because they were off cuts from larger fillets, perfect for a soup!

Chop the herbs.  I like to chop about 2/3 of them finely, and the rest coarsely and mix them together:

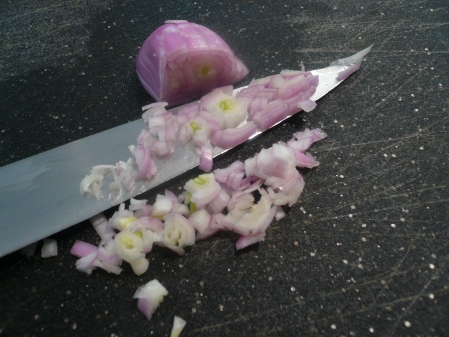
Finely chop the garlic:

Heat 3 tablespoons of olive oil on high heat in a large skillet.  Pick a pan that has a tight-fitting lid.  Add about 1/2 of the chopped garlic and all the mussels, put the lid on and hold it on tightly then rotate the pan vigorously while holding the lid down firmly.  This will coat the mussels with the garlic and should only take a 15 seconds or so.  Keep the bottom of the pan on the heating surface.  Open the lid, pour in the wine and immediately put the lid back on.  Hold the lid on firmly to create a little steam pressure in the pan and continue to vigorously rotate and shake the pan while the mussels cook. After about 1 minute, the shells should be partially opened.  When you take the lid off, the smell of the garlic, mussels and evaporated wine will be fantastic!

Add the fish, stir and continue cooking with the lid held tightly for only about one minute or so on high heat.

When the fish is partially cooked, about a minute or so, pour the entire contents of the pan into a bowl and set aside.   If there are any mussels with unopened shells, discard them.
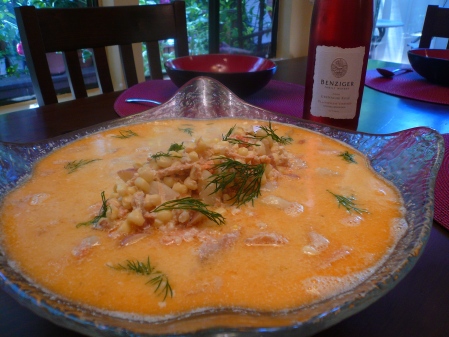
In the same large skillet heat the remaining olive oil and saute the remaining garlic until it begins to turn golden, add the crushed red pepper, half of the chopped herbs and the liquid from the mussels and fish.  When hot, combine the mussels and fish with the liquid and herbs in a large bowl, drizzle some olive oil over and add the remaining herbs.
Serve immediately.

Taking Break from Blogging to Learn to Play Banjo

May 8, 2010

In a reply to Jaded Fork, I recently posted the following response:

Hello again, Jaded Fork,  I have suspended recipe blogging activities and am learning to play the banjo. I am practicing 3 -4 hours a day so I don’t have time to blog as well just at the moment. BUT, as our governor here in California said, “I’LL BE BACK!” My cooking is being reborn and will let you know when I post next.

Blog is undergoing redesign. Please check back later.

September 24, 2009

Fish Stock

June 21, 2009

“…..stock is everything in cooking, at least in French cooking. Without it, nothing can be done. If one’s stock is good, what remains of the work is easy; if, on the other hand, it is bad or merely mediocre, it is quite hopeless to expect any thing approaching a satisfactory result.
The workman mindful of success, therefore, will naturally direct his attention to the faultless preparation of his stock, and, in order to achieve this result, he will find it necessary not merely to make use of the freshest and finest goods, but also to exercise the most scrupulous care in their preparation, for, in cooking, care is half the battle.”
– Georges Auguste Escoffier (28 October 1846–12 February 1935).

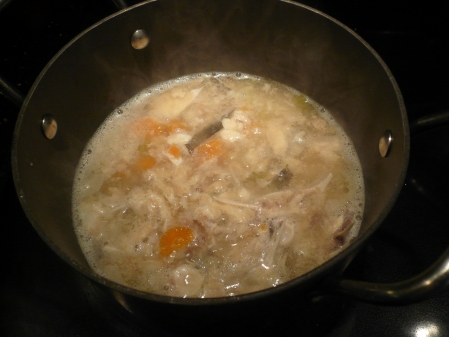
Yesterday I cooked a Grand Fish Stew for a party of six.  It was an intense and flavorful stew that was based on a stock that had a depth of flavors that I had “layered” on in three different phases that stretched throughout the day.  Overall, the stock took several hours to prepare, in three separate phases.

Many of the recipes and principles of cuisine that guide us today can be traced back to a few great, innovative chefs.  The legendary Auguste Escoffier (Executive Chef at the Savoy Hotel in London in the 1890’s and named “the Emporer of Chefs by Kaiser Wilhelm) hit the nail on the head when discussing the importance of stock in his milestone book, “Le Guide Culinaire”.  If you are seriously interested in cookery, I encourage you to research and read more of Escoffier.  He had a dynamic career as chef at some of the finest hotels in Europe including  The Savoy, Grand Hotel Monte Carlo, Hotel Ritz Paris, Grand Hotel Rome, etc.  He is credited with the invention of over 10,000 original recipes, although many of Escoffier’s methods and techniques can be traced back to Antoine Careme (1784-1833).  One of the more bizarre facts about Escoffier’s life is that in 1911, it is reported that he trained Ho Chi Minh as a pastry chef at the Carlton Hotel in London!

Georges Auguste Escoffier (28 October 1846–12 February 1935)

Georges Auguste Escoffier (28 October 1846–12 February 1935)

And now, back to the main purpose of this post, to describe how I made the fish stock that was the basis for yesterday’s fish stew:

Ingredients for a large batch (enough stock to use as the basis for a fish stew of 10 – 12 servings):

  • 4 lbs fish bones, white-fleshed fish only such as halibut
  • 3 cups dry white wine
  • 12 cups water
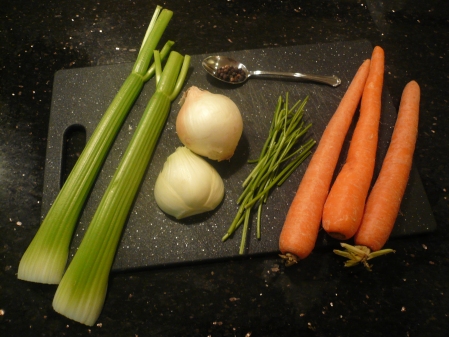
  • 3 carrots, peeled and sliced thin
  • 1 large or 2 medium onions, sliced and diced
  • 2 celery sticks, sliced and diced, no leaves
  • 1 medium fennel bulb, sliced and diced
  • 1 teaspoon black peppercorns
  • handful of celery stalks
  • Some fennel tops
  • 2 bay leaves
  • Sprigs of fresh herbs such as thyme, parsley, savory.
  • 2 pinches saffron threads
  • 3 tomatoes
  • 1 small to medium leak
  • 6 cloves garlic, peeledand chopped fine
  • Salt
  • 4 tomatoes, peeled, sliced and diced

Method, 1st Phase:

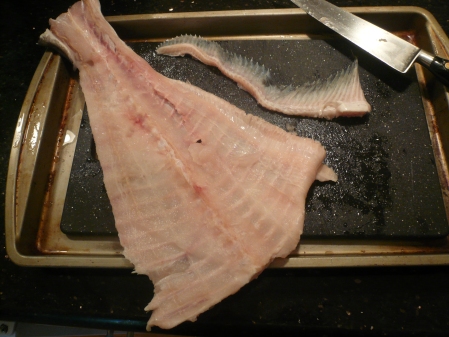
Remove gills, fins, organs from fish bones, cut them up, if necessary, into pieces that will fit into a large pan.

P1080139

P1080140

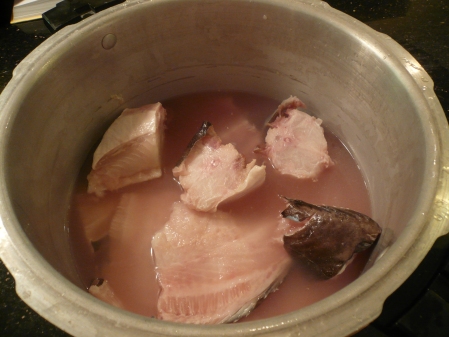
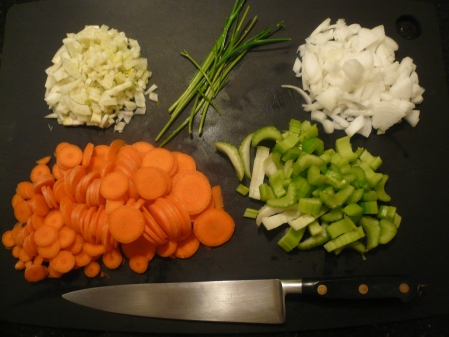
Cover with 8 cups of water, 3 cups dry white wine, add salt and bring to the boil.  Remove any foam from the surface and the add the sliced carrots, diced fennel bulb, diced onion, diced celery stalks, black peppercorns and parsley stems. P1080145

P1080148

Bring to a boil, reduce to a slow simmer, cover and cook for 1 hour.

P1080188

Remove all the bones from the stock and reserve for next phase. Very carefully pick through the stock, using a large “spoon with holes in it” making sure that all of the bones, skin, gristle and any other unpleasant or inedible pieces are removed at this stage.  Leave all the fish pieces and vegetable pieces, they will add texture and thickness to the stock.  Set the1st phase  stock aside for later.

Method, 2nd Phase:

Heat 2 tablespoons of olive oil in another large pan and add the sliced leek and cook until golden and softening.  Add the fish bones from the first phase of stock,  4 cups of water, some salt, and a few black peppercorns.  Bring to the boil and simmer for 1 hour.  Allow this “second” stock to cool and then filter this “2nd phase” stock in chef’s muslin.  Squeeze the muslin to liberate all the liquid and discard the muslin and contents.

Method, 3rd final phase:

After the two stocks have cooled, remove any congealed fat that rises to the surface.  Combine both stocks into one.  In a large pan heat 2 tablespoons of olive oil over medium heat. Cook gently until softening. Be careful not to brown or burn the garlic.  Add the tomatoes and stir together and cook gently for 5 minutes ago, stirring to ensure that the garlic does not burn.  Add in the combined stock.  Taste and adjust with salt as necessary.  Add some oregano, thyme, parsley and a bay leaf and simmer very gently for 20 minutes.  Allow to cool and refrigerate if not used within an hour or so.  Although this stock can be frozen and used as required, it is preferable to make the stock, refrigerate and use fresh within a day.

Eggplant Spaghetti

June 16, 2009

P1080090crop

This simple, inexpensive dish tastes really good.  The key to preparing this dish is to thoroughly salt both sides of the eggplant slices and leave them for 30 minutes before rinsing and drying.  This will prevent them from absorbing too much oil during cooking and will help them to retain their light and fluffy texture.

Ingredients (serves 4 to 6)

  • 2 eggplant (aka aubergine), sliced into 1/2″ slices with peel left on
  • Salt – enough to cover both sides of all eggplant slices
  • Extra virgin olive oil, about 1/2 cup
  • 1 medium onion, chopped
  • 6 cloves garlic, chopped
  • 1 can, 24 ozs, of chopped tomatoes
  • Salt and freshly ground black pepper
  • 1/2 teaspoon sugar
  • 12 ozs wholewheat spaghetti
  • 4 tablespoons fresh basil plus a handful of other fresh herbs of your choice, if you wish (oregano, marjoram, thyme, etc), coarsely chopped
  • 4 ozs strong-tasting grating cheese such as pecorino.

Method:

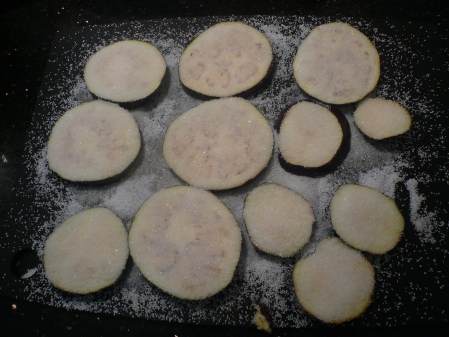
1.  Slice the eggplant into 1/2″ to 3/4″ slices and lay them on a cutting board or other flat surface and sprinkle salt on both sides of the slices and set aside for 30 minutes.

The eggplant is sliced, salted and set aside for 30 minutes.

The eggplant is sliced, salted and set aside for 30 minutes.

2.  Start heating a large pot of water to cook the spaghetti in.

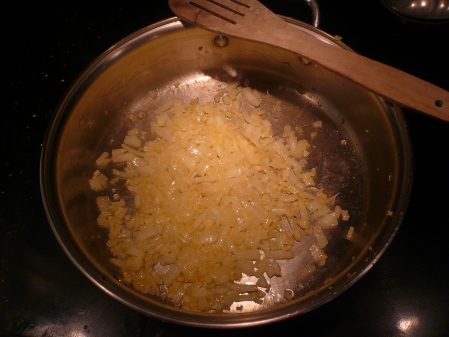
3.  Make the sauce while the water is heating and the eggplant slices are sitting in salt.  Heat 2 tablespoons of the olive oil in a large pan and sauté the chopped onion and chopped garlic until they are soft.

Cooking the onion and garlic in olive oil.

Cooking the onion and garlic in olive oil.

Add the tomatoes and simmer over medium heat until the mixture is reduced to a sauce-like consistency. Season with salt, pepper and 1/2 teaspoon of sugar.  Add half of the coarsely chopped herbs and set the sauce aside for later.

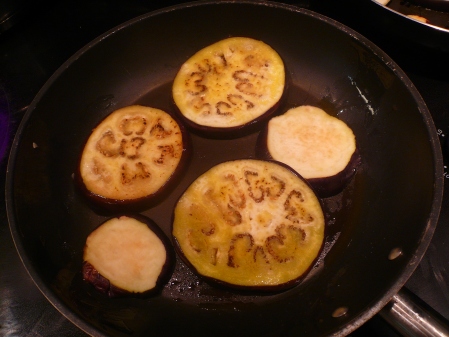
4. Preheat the oven to 400 degrees farenheit.  Rinse the salt off the eggplant slices and dry them by patting with paper towels.  Heat one or two tablespoons of olive oil in a frying pan over medium heat and quickly fry the eggplant slices, until the surface is slightly browned.

Frying the eggplant slices in olive oil.

Frying the eggplant slices in olive oil.

Turn the slices over and brown the other sides.  When browned transfer the eggplant slices onto cookie trays and place them in the oven and cook for about 10 to 12 minutes while the spaghetti is cooking.

5.  Put one tablespoon of olive oil and some salt in the boiling water and cook the spaghetti in it until al dente.

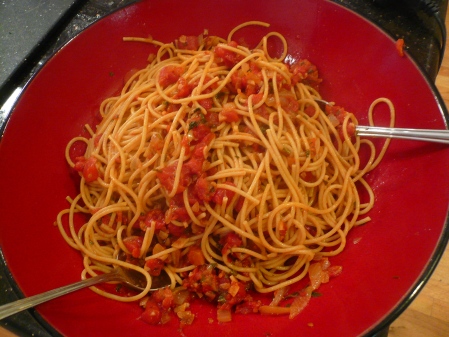
6. Drain the cooked spaghetti and toss it in a bowl with the sauce.

The cooked spaghetti is combined with the sauce.

The cooked spaghetti is combined with the sauce.

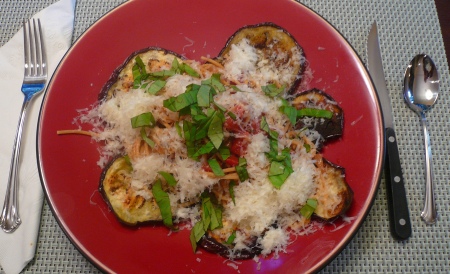
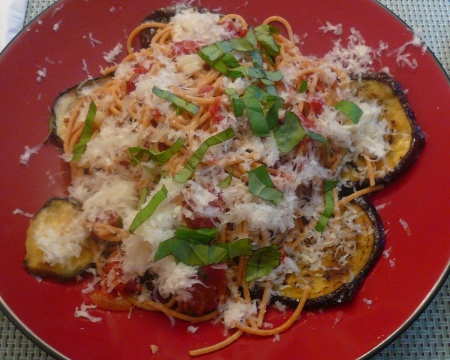
7. Serve by placing the cooked eggplant slices on the plates, placing the spaghetti with sauce on top with a handful of grated cheese and finishing with a generous garnish of the remainder of the chopped herbs.

The spaghetti and sauce are served on the eggplant slices and coverd in grated chees and chopped herbs.

The spaghetti and sauce are served on the eggplant slices and coverd in grated chees and chopped herbs.

Salmon and Corn Chowder

June 7, 2009

P1070243

I went to the fish counter at my local store this morning looking for fish heads and bones to make a fish stock for a fish stew.  The only bones available today were salmon bones.  This fish is way too oily to use for stock but there was a lot of meat on the bones, so I bought them and decided to make a chowder with some fine fresh corn cobs that I saw at the same store.  I came away with about 7 lbs of salmon bones and paid only 50 cents/lb.  I retrieved about 1  1/2 lbs of salmon from the bones, so it was a very economical way of eating delicious fresh salmon (albeit somewhat labor intensive).  To separate the meat from the bones, place all the salmon bones in a large pot of boiling water and simmer for 2 to 3 minutes only.  Drain off the water and discard and place the bones on a large shallow baking tray.  Hand pick the meat off the bones and discard the skin, bones and other remains.  If you prefer not to do this or don’t have access to salmon bones, you can use 1 lb of salmon fillets with the skin and small bones removed instead. 

Ingredients for 4 servings:

  • 1 lb salmon with skin and bones removed
  • 2 tbs butter
  • 2 tbs extra virgin olive oil
  • 2 shallots, minced
  • 4 cups chicken stock
  • 4 medium unpeeled red potatoes, cut into 1/2″ dice
  • 2 cups of corn kernels
  • 1 cup half and half (this is half cream and half milk)
  • Sea salt and ground pepper (white pepper is preferable)
  • Fresh dill sprigs for garnish

Method:

Melt 1 tb of olive oil and 1 tb of butter in a pan and cut the salmon into 1″ pieces.  Gently sauté the salmon in the butter and olive oil for about 2 – 3 minutes until the pieces are just opaque on the outside.  Take off the heat and reserve for later.

Mince the shallots and sauté them in the remaining butter and olive oil for about 3 minutes until translucent.  P1070222

Add the stock, stir and turn the heat up high until it is boiling.  Add the diced potatoes and reduce to a simmer.  Partially cover and cook until the potatoes are tender, about 10 to 15 minutes.

P1070227

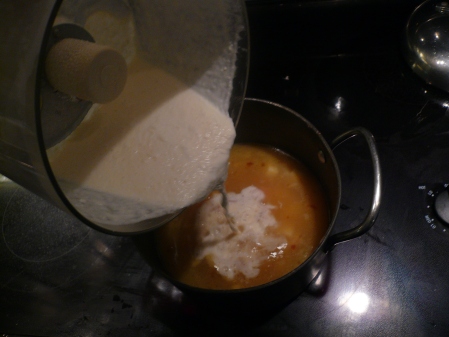
In a blender or food processor put 1/2 cup of the corn kernels and 1/2 cup of the half and half. Purée until smooth and mix this into the chowder.

P1070234

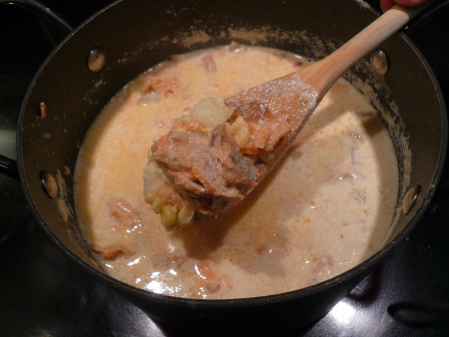
Add the rest of the half and half and the remaining corn kernels and simmer for about 5 minutes until the corn is tender then add the salmon and cook until it is cooked though, for about 2 minutes. 

P1070240

 Be very careful not to overcook or the subtle flavors and textures will be diminished.  Season with salt and pepper.

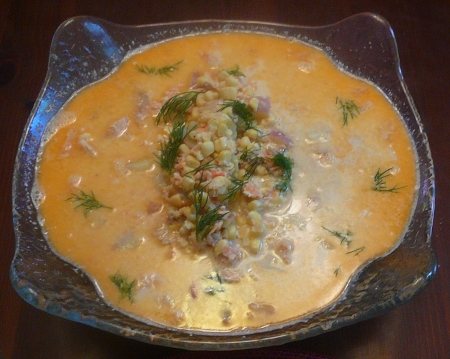
Serve immediately with the fresh dill sprigs as a garnish.

P1070249crop

Curried Zucchini / The Fall of the British Raj

June 2, 2009

P1070130Crop

Regular readers of this blog know that I am an Englishman living in California.  I moved here when I was 23 years old but go back to the mother country to visit regularly.  Indian influences are very prevalent in English cuisine and Indian food is possibly the most popular food in England.  I recently read that the most-served dish in all English restaurants is Chicken Tikka Masala….    I rest my case!   This popularity may be driven partially by our obsession with the history of the once glorious British Empire but is more likely because there seem to be as many Indian restaurants on every English High Street as there are pubs.  A couple of pints of beer and a curry has long been a mainstay of the English social regime!  For my family, the connection goes deeper.  My grandparents emigrated to India in the 1920’s and my Dad was born in Calcutta in 1924.  He returned to England to go to boarding school when he was five years old, but Granny and Grandad stayed in India pretty much until the fall of the British Raj which occurred in 1947.  Dad joined the Royal Air Force during World War II and was posted to another corner of the British Empire, the Province of Burma, which subsequently gained independence in 1948.  Here’s a great photo of Dad in his Air Force flying jacket around the early 1940’s:

P1040210

Dad tells a good story about his trip, as a young Flying Officer,  to active duty in Burma.  He managed to persuade his Commanding Officer to give him a couple of days leave on his way to Burma.  Dad arranged to be dropped off in Calcutta and made a surprise visit to his parents’ home there on his 21st birthday.  I can imagine that my grandparents must have been very surprised and proud to see their young moustachioed son on his way to serve his country at war.  When on active duty in Burma, he flew in de Havilland Mosquitoes, a very fast plane of revolutionary design.  Capable of speeds of well over 4oo mph, they were the fastest and most versatile fighter/bombers of their time.  The construction was advanced wood composite made mostly from Ecuadorean balsawood sandwiched between sheets of Canadian birch. P1040177crop

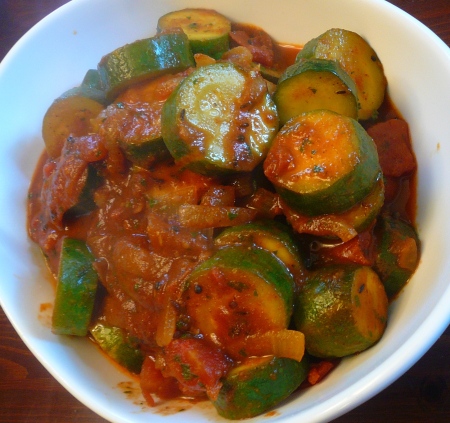
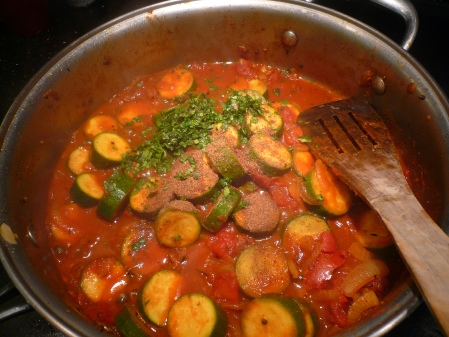
Oh gosh, I am way off subject…   back to the recipe.  This dish is actually quite light and is relatively quick to prepare but really has a nice mixture of complex flavors.  It has a slight bite but is not really “hot”.  Personally, I like the zucchini (courgettes if you are in the U.K.) to be  only cooked slightly so they are still nice and crunchy.  If they are overcooked they get too mushy and the whole dish turns into a sort of Indian-flavored ratatouille, which is not the intent!

Ingredients:

  • 2 lbs zucchini
  • 1 medium onion
  • 1/2 tsp mustard seeds
  • 1/2 tsp cumin seeds
  • 2 tbs oil (I use olive oil)
  • 3 fat cloves garlic
  • 1/4 tsp chilli powder
  • 1/4 tsp ground turmeric
  • 1 tsp ground cumin
  • 1 tsp ground coriander
  • 1/2 tsp salt
  • 1 tbsp tomato paste
  • 14 oz can chopped tomatoes
  • 2/3 cup water
  • 1 tbsp chopped cilantro
  • 1 tsp garam masala

Method:

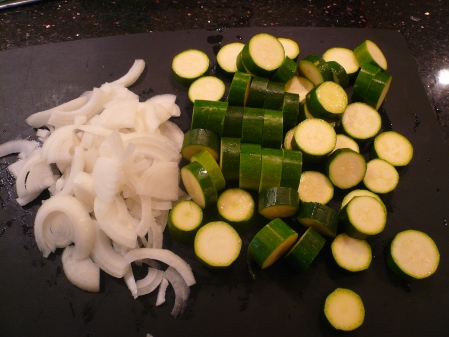
Cut the zucchini into 1/2″ slices.  Slice and chop the onion.

P1070122

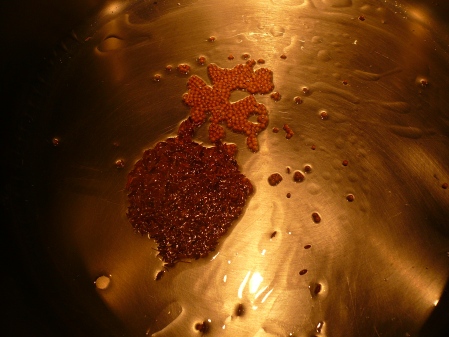
Heat the oil in a large pan and fry the cumin and mustard seeds for 2 or 3 minutes until they begin to pop.

P1070123

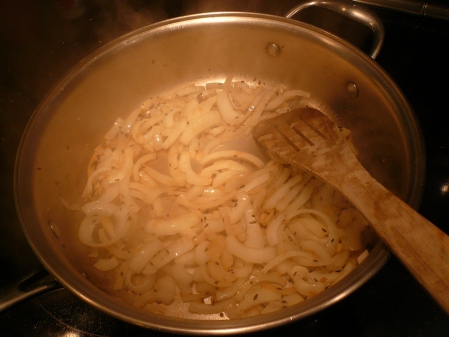
Add the onion and crushed garlic and cook for about 5 minutes until the onions are softened.

P1070124

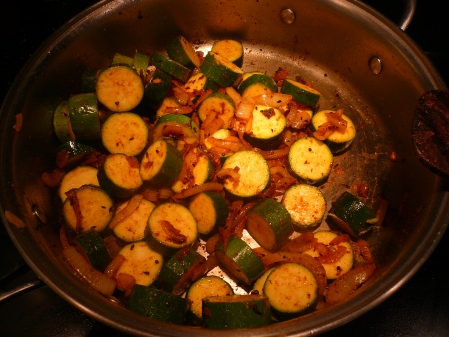
Now add the chilli powder, ground coriander, cumin, turmeric and salt a cook for 2 more minutes.  Then add the sliced zucchini and cook for 5 more minutes stirring frequently to ensure that the zucchini pieces are well covered with the spices.  P1070126

Mix the tomato paste in with the chopped tomatoes and mix them all into the pan with the water and stir well.  Cover the pan and simmer for 4 minutes, then remove the lid and cook for 4 more minutes.  Stir in the chopped cilantro and garam masala and cook for about 5 more minutes until the zucchini are cooked to your liking (I recommend that you keep them nice and crunchy). P1070127

Serve immediately with some Indian bread such as Naan bread.

While digging through old family photos, I came across this family pic from the 50's.  Yes, that's me with my tongue out, next to my brother, Andy, who appears to be in pain! Mum and Dad are in the background.  I have two more brothers who are not in this photo, but I have some equally embarassing photos of them that I will include in future postings......

While digging through old family photos, I came across this family pic from the 50's. Yes, that's me with my tongue out, next to my brother, Andy, who appears to be in pain! Mum and Dad are in the background. I have two more brothers who are not in this photo, but I have some equally embarassing photos of them that I will include in future postings......

Egg Fried in Olive Oil Variation as a Preamble to Woodwork Project

May 27, 2009

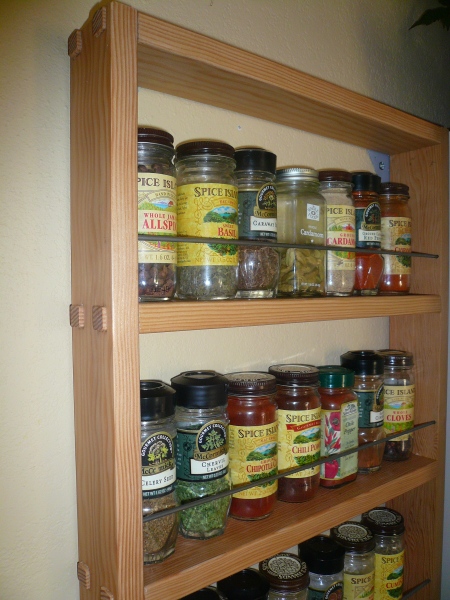
Our home kitchen management committee met last week and it was decided, over a decent bottle of Pinot Noir(2006 Four Clone Pinot Noir, by Curvare, from the Sonoma Coast and Carneros Regions) that we needed a better SMS (Spice Management System). Our inventory had grown and sprawled over several drawers.  So, after breakfast the next day I set about my project.

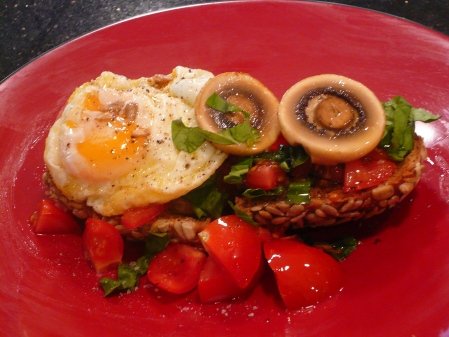
P1060893Breakfast was basically a variation on the one I discribed in this posting a few weeks ago.  I have made a couple of changes, though.  I now use a very small pan, about 3 1/2 or 4 inches in diameter to cook each egg and then cook the mushroom (sliced horizontally) in the remaining oil after spooning the cooked eggs onto the diced tomatoes and toasted breadstick.  The mushroom slices were cooked quickly, after the eggs,  and then poured, with the remaining hot olive oil onto the tomatoes and toast.  I served this on top of lightly toasted vegan breadstick, rolled in sunflower seeds from Judy’s Breadsticks.

P1060905crop

This is the finished spice rack which was constructed using standard size clear douglas fir stock of  2  1/2″ x 11/16″, with one coat of sanding sealer and two applications of neutral furniture wax.  The construction features exposed mortice and tenon joinery.  The exposed tenons are shown in the picture below.  I needed that breakfast – there was a lot of hand chiselling to do!  The wire at the front is 1/8″ dia. steel welding rod, cleaned with a 3m pad then waxed.  I have always liked the look of clear Douglas fir.  Here on the West Coast of the USA this wood is very abundant and is the most common wood used as a structural component in wood construction.  It is relatively cheap here and greatly underrated, I think, as a finish wood.

I love cooking but it’s nice, once in a while, to make something that isn’t eaten!

P1060902

All-In-One Fruit Cake

May 24, 2009

P1060436crop

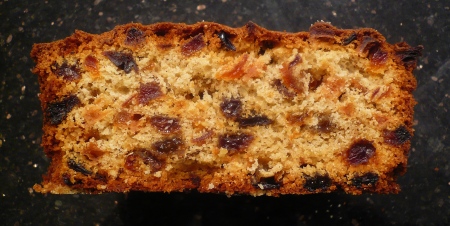
This is the fruit cake of my childhood.  It was our Dad’s favorite cake and Mum cooked it regularly.  When I grew up and left home Mum would bake it when I visited home.  When I bake this cake now the spicy aromas from the oven bring back a host of childhood memories!  When we were kids and Mum baked this cake, my brothers and I would hang out in the kitchen until the cake was in the oven and, if we’d behaved ourselves, we would be allowed the great privilege of licking the mixing spoon or the mixing bowl!  This is still a great treat for me and one of the pleasures of making this cake.  Try it – you’ll see what I mean!

This is a much lighter, dryer cake than the stereotypical “English-style” dense, fruitcake that most people think of and it can definitely be used as an everyday cake.  I am a great believer in fruit cake as an energy snack – it is much tastier and way more economical than the ubiquitous “energy bar”.   With the ingredients that I use it can be baked for less than $5 (US) and yields about 8 to 10 generous slices, which makes it about 4 times cheaper (and 100 times more delicious) than a mass-produced yukky energy bar.  I recommend that you put a slice of this cake in your packed lunches or bake for your family and friends and enjoy it with a hot cup of tea or a glass of milk.

Ingredients

  • 250 gr / 8 0zs self-raising flour
  • 1 tsp “Mixed Spice”.  This is a spice product found in the UK that comprises cinnamon, nutmeg, allspice and other spices.  In the US, I use: 1 tsp “Pumpkin Pie Spice” plus 1/4 tsp ground Allspice.  When I have been unable to find either of these, I have used 1 tsp Garam Marsala, which is surprisingly good and very aromatic during baking.
  • 125 gr / 4 ozs soft margarine or butter softened at room temperature  (I prefer butter, but Mum always used margarine)
  • 2 eggs
  • 125 ml / 4 fl ozs milk
  • 125 gr / 4 ozs caster sugar.  In the US this is called “Baker’s Sugar”. If you can’t find it use regular sugar.
  • 375 gr / 12 ozs mixed dried fruit.  In the UK, this is readily available for fruit cakes and comprises sultanas (golden raisins), currants, raisins, orange and lemon peel.  I haven’t been able to find the same mix in the US so I use “Jumbo Raisin Medley” from Trader Joes. It is only $3 /lb and comprises seedless golden light raisins (sultanas), flame raisins and gumbo raisins.

Method

  • Grease a 1 kg / 2 lb loaf tin and preheat oven to 160 C / 325 F / gas mark 3
  • Sift the flour and spices together into a large mixing bowl and beat them together for 2 -3 minutes until mixed
  • Place the cake mixture in the prepared loaf tin and bake in the center of the preheated oven for about 1 hour and 30 minutes.  Test with a knife – if it comes out clean, it is ready!
  • Remove from oven and allow the cake to cool in tin for 10 mins then transfer to a cooling rack until completely cooled.P1060438crop